Last Updated on April 26, 2024 by Audrey Scott
You have a virtual stack of geotagged photos. So now what?
Share them with the world, and share where in the world you've been.
This third (and final…save the tears) segment of our geotagging case study is intended to help you upload your geotagged photos and share them with the world by integrating them with websites that support Google Maps or Yahoo Maps.
If you've missed the first two scintillating parts of our case study, check out Part 1 – Basics and Concepts and Part 2 – Importing and Embedding.
Uploading Geotagged Photos
We store select photos on Flickr for display on our website. When we began geotagging our photos, we required an uploading tool that would retain geolocation information in the EXIF data during the uploading process. The best tool for this in our experience so far is PictureSync – it works with Flickr, Facebook, Kodak Gallery, Smugmug, Shutterfly and a handful of other photo sharing services.
- Software: PictureSync, freeware ($15 license is available for a version with advanced features)
- Objective: to upload geotagged photos with titles, descriptions, and tags to your favorite photo sharing website
- Operating systems supported: Mac OS
- PC alternative: Flickr Uploadr 3.0.5
PictureSync also offers the ability to title, caption and add tags to your photos offline. This is crucial for us because this allows us to accomplish the bulk of our photo documentation work offline and upload photos only when we’ve found a decent internet connection.
Unfortunately, PictureSync is only available for Macs at the moment. The website indicates that developers are working on a PC version (currently in Alpha), but don't hold your breath. Flickr’s newly updated Uploadr 3.0.5 is available for PCs and also for Mac OS. It offers similar features to PictureSync, including the ability to upload location information and to tag and title photos offline.
Even if you are not using a Mac with PictureSync, you may find it useful to read this section, as the principles of tagging photos and uploading geotag information will be similar regardless of which tool you use. You may also skip to the bottom to read about how to match your photos with Google Maps or Yahoo Maps.
Selecting Images with PictureSync
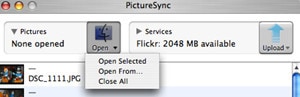
Select a folder of images to upload by clicking the “Open” button and choosing “Open From” from the drop-down menu.
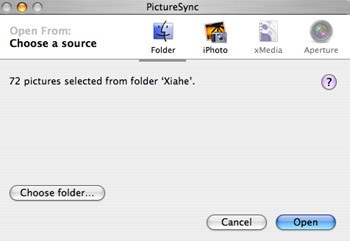
Click “Choose Folder” and select the folder of photos you’d like to import. Then click the “Open” button. Alternatively, you can drag and drop images directly from the Finder into the PictureSync window above.
Digitally Documenting a Photo with PictureSync
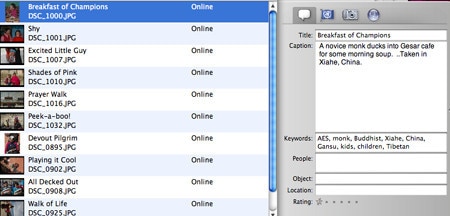
As a result of the import process, the window fills with photo thumbnails and summary information. If you click on an individual photo, you'll notice a small window on the right-side of your screen listing detailed documentation information about the photo. If you click the button with the conversation bubble on it, a screen will appear in which you can enter a title, caption, and keywords (tags) for the photo. This information will be automatically saved to the photo’s EXIF data.
Manual Insertion of Location Data with PictureSync
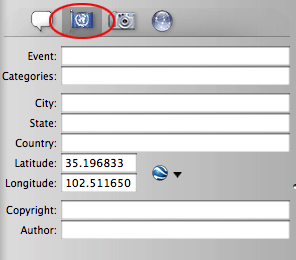
If you click the button that looks remarkably similar to a United Nations Flag, PictureSync will display location data associated with the photo. In the rare case that a photo sneaks through the geotagging process described in Part 2 of this series without being geotagged, there's one last chance to enter location data for the photo before it is uploaded. Find another photo taken from the same location. Copy (Control-C) the latitude and longitude data from the geotagged photo and paste (Control-V) it into the latitude and longitude fields of the untagged photo. Voila, you now have a geotagged photo.
Uploading Photos
Once you’ve finished checking that all photos have location information, titles, captions and keywords, you are ready to upload.
Before you upload, however, you must configure PictureSync for the photo sharing service (e.g., Flickr, Smugmug, etc.). To do this, select “Window” from the main menu, then select “Accounts”. Here, you can select your photo sharing site of choice and it will walk you through the authorization process.
Due to the large size of digital photo files, we resize images (800 pixels) to ensure that file sizes are more manageable for the web. Click “Settings” if you wish for PictureSync to resize images upon upload and set the size.
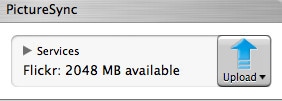
Make sure you have an internet connection and click the “Upload” button. The tool will begin the uploading process, provide feedback if there are any issues and give a status report at the end.
Viewing a Geotagged Photo on a Map
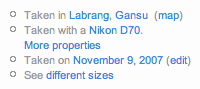
There are numerous ways in which geotag data can be used and geotagged photos can be displayed. We'll highlight two examples:1. Flickr – Each individual photo page on Flickr includes EXIF data (geotags and location data) on the bottom right-hand side:
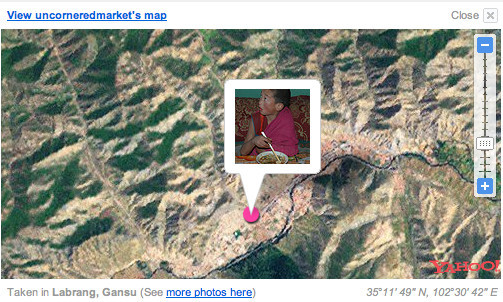
Click on the “map” link and a Yahoo Map like the one below will be displayed in a pop-up window. You can zoom in or zoom out using the map controls in order to adjust the level of detail on the map.
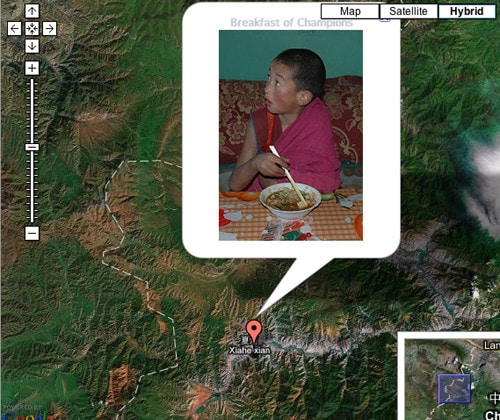
2. Our Photo Gallery: We also display our photos in our website photo gallery (by accessing our photos and their data stored on Flickr). The output of the embedded geotag location data is a Google Map at the bottom of each of our individual photo pages. Just scroll to the bottom of this page and you can move about the satellite image (using the controls at the top left of the Google Map) and zoom in and zoom out (using the slider control just beneath them) to have a more detailed sense of the area in which the photo was taken.The level of detail available on Google Maps satellite images is astounding, going so far as to show the rooftops of individual homes and buildings in towns and cities.
If you’re not a member of Flickr, try another online option to display your geotagged photos like SmugMug or Google’s Picasa. Check out this website for a detailed review of these and other online options.
Still with us?
We realize that we've presented a lot of detailed information about geotagging in this series. Before we became geotagging pros, we collected information from dozens of websites to inform our hardware and software decisions and to assemble our own process.
Now that you know everything there is to know about geotagging your photos, all you'll need to do is prepare yourself for the entire geotagging technology landscape to continually evolve. Whatever you do, have fun!
Fabulously informative set of articles – thanks for sharing your experiences!
I was wondering if you have had any experience with Geo Tagging and Aperture? Are there any that marry up well with that program?
Thanks,
Moe
@Moe: Not sure about geotagging tools and Aperture (we don’t use Aperture). However, we will be doing a geotagging software review update in the next week or two that might prove helpful. So stay tuned.
The work you put into this series really shows…this has been very helpful, thank you for sharing this information!
I picked up geotagging from your website almost 6 years ago when I was living in London and have gone on to faithfully geotag my photography. Along the way, I have also managed to hack a location/map display onto my photoblog which is based on Wordpress. Things were working fine until recently when for some reason (perhaps Google was tinkering with their API) the maps shown on my site became buggy — zooming in and out on the Google Map will lead to map tiles loading erratically beyond the defined map container. I came back to your site for inspiration and realised that you have moved away from Google Maps on your galleries and in its place, you are using a feature called Mapbox. Would it be possible for you to share with me your experience and the reasons why you have made the switch?
Thanks for inspiring me to geotag my photography from the very beginning!
Great to hear that that you’ve been faithfully geotagging your photography! The simple answer regarding the switch to Mapbox is that we change photo hosts and galleries. We used to use Flickr and redisplayed this on our site with the Google Map. However, we changed over to SmugMug a couple of years ago and they use MapBox so that’s what is displayed now. Hope you’re able to figure out the problems with Google Maps.
Thanks, Audrey. Good to hear from you. I realised your switch to SmugMug when I browsed around your pages describing the technologies you are using. I decided to make some changes to the way my maps are displayed, so in a way I have managed to circumvent the issue. Are you still using the AMOD geotagger that was recommended on your pages? I recently bought a new DSLR and made sure that it came with built-in GPS for the convenience of having my pictures geotagged on the fly. Unfortunately, this does drain the battery a lot quicker.